Loading timer

LTSV > Rail Data > Help > User Guide part 2 > Section 2.1
User Guide 2: Contributing Content - Section 2.1: Registration and account management
Contents of this section:
2.1.1 - Registration
2.1.2 - Logging-in and logging-out
2.1.3 - My Account
2.1.4 - Site settings
2.1.5 - Permissions and approvals
2.1.6 - Viewing other member's accounts
2.1.1 Registration

screenshot
To start creating an account, click on the Register link in the top right-hand corner of any webpage.

screenshot
The registration page has a number of fields to fill in. Each has a help-tip to offer more guidance. Simply hover your mouse pointer over any of the underlined question marks. The first three fields are required, the fourth is optional.

screenshot
Fill in the fields as required. The About You field is optional but can be used to tell other users a bit more about you and what you are interested in. When ready, click on the Submit for preview button at the bottom.

screenshot
If there are any problems with your inputs, an error message will appear as shown above. Problems could include missing out a required field, using an e-mail address or username that is already in use, or entering some invalid characters. If this happens, make appropriate changes then click the Re-submit for preview button.

screenshot
If your entries are accepted, you will be shown a preview of how they will appear. Be aware that some special characters and punctuation marks are automatically removed as a security measure. It is worth checking that the preview still looks the way you want it to before clicking on the Submit button. Or you can make changes in the lower part of the screen and click on Re-submit for preview.

screenshot
To ensure that the e-mail address you provided is valid, the page will then send an activation code to that address. You will need to enter this before proceeding. If you do not have access to your e-mail straight away, you can activate your account later on. Simply try and log-in as normal (see section 2.1.2), and you will be prompted to enter your code. If you do not receive the e-mailed activation code (and it is not in your spam folder), please contact Site Admin at e-mail tom@ltsv.com or by using the Contact Us page.

screenshot
To activate your account, enter the code provided (either type it in, or copy and paste from the e-mail) and then click on Activate.

screenshot
If the activation code that you entered is correct, your account will be activated, as shown on the screen above. You can now log-in by clicking one of the links on this page. A log-in link will also appear in the top right corner of every page.
2.1.2 Logging-in and logging-out

screenshot
The log-in screen has just two input fields, in which you need to enter your e-mail address and the password you selected.
screenshot
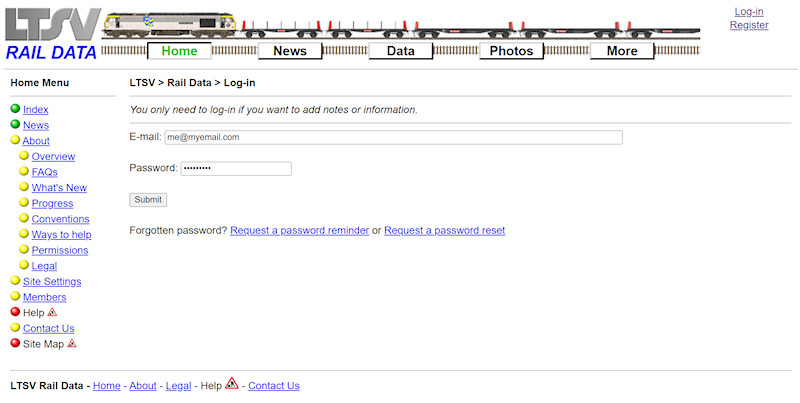
Note that the password field hides the characters that you enter. When ready, click the Submit button.
screenshot
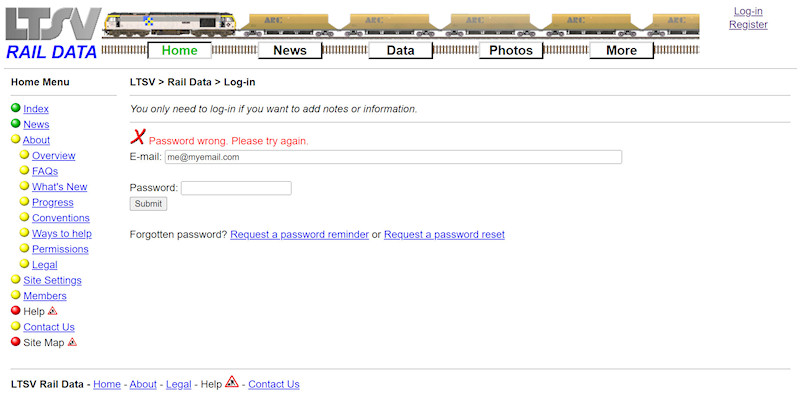
If the details you entered are incorrect (such as an e-mail address that does not exist, or a password that does not match), you will be shown an error message and offered the chance to try again. If you have forgotten your password there are two further options, accessed using the links underneath.
screenshot
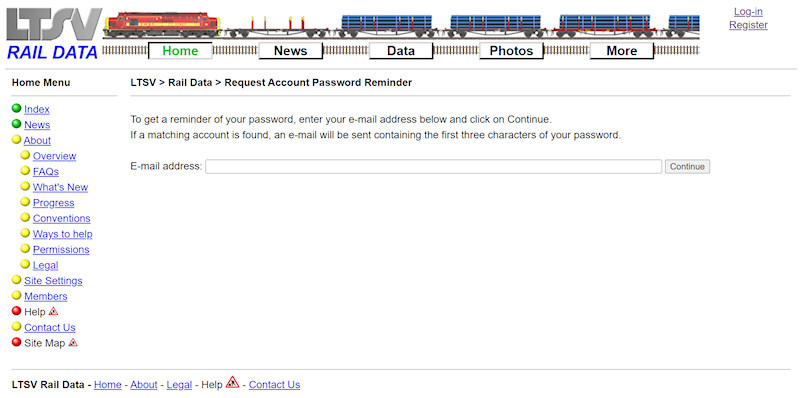
To use the Password Reminder function, enter your e-mail address and click on Continue. If the address is found, an e-mail will be sent to it, containing the first three characters (only) of your password. This might be enough to jog your memory. If the e-mail address is not found, an error message will be shown. Contact Site Admin if you need more support.
screenshot
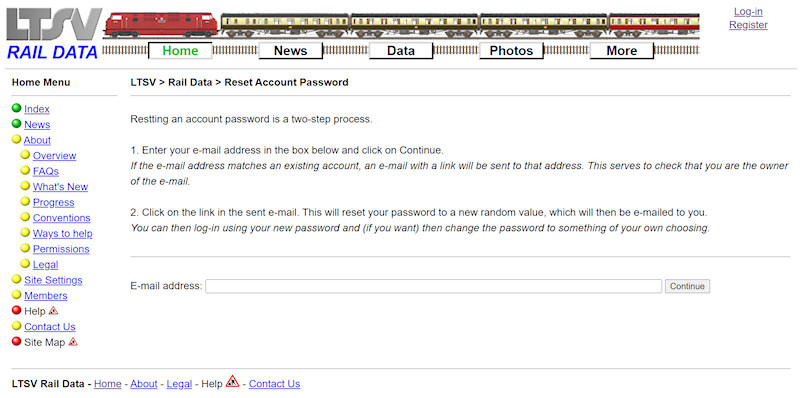
The Password Reset function is a little more complicated, as I don't want to allow users to reset other user's passwords! At the first step, enter your e-mail address and click on Continue. If the e-mail address is found, an e-mail will be sent to it, containing a link to reset your password to a new randomly-generated one. This will then be sent to you in a second e-mail.

If you have problems with logging-in, please get in touch with Site Admin. For example, you may no longer have access to the e-mail account you used to register with. I will do my best to help with any issues experienced.
screenshot
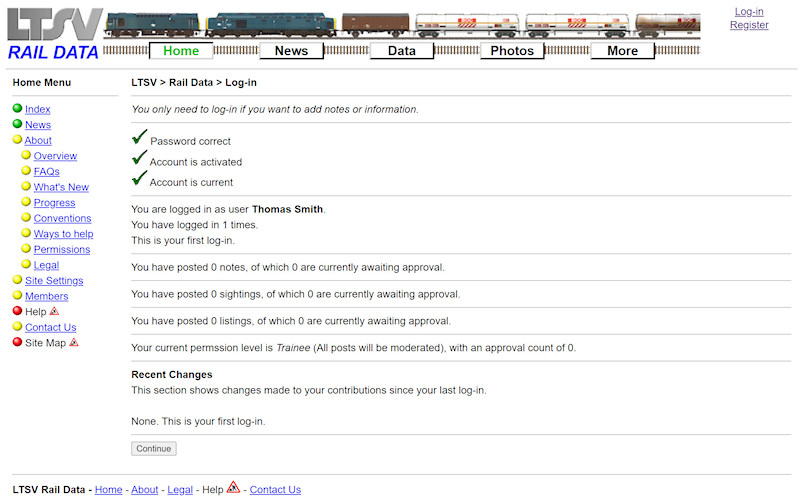
If your e-mail and password were entered correctly, you will be shown the screen as above. This gives basic details of your account, a summary of all the content you have contributed, and details of any changes made to your content since your last log-in. Naturally, the first time you log-in this will all be fairly empty! You can access this information at any time using the My Account page (see section 2.1.3).
screenshot
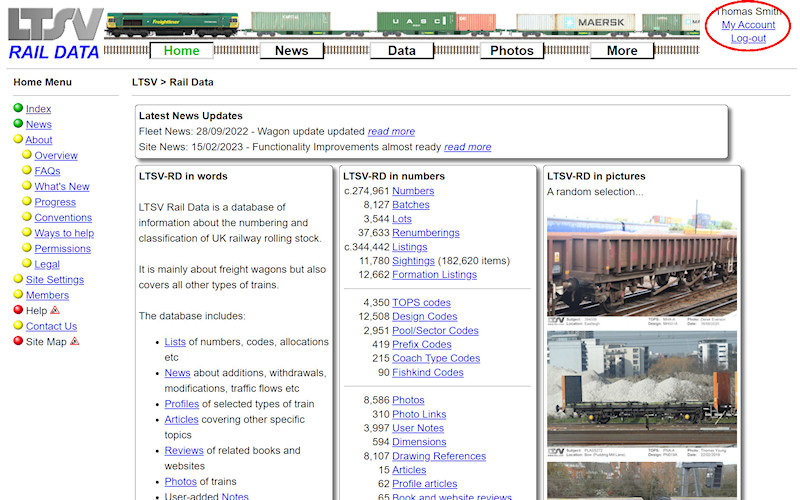
When you click on Continue, you will be returned to the home page (or whichever page you were on before you clicked on log-in), but you will note that your username and relevant links now appear in the top right-hand corner.
screenshot
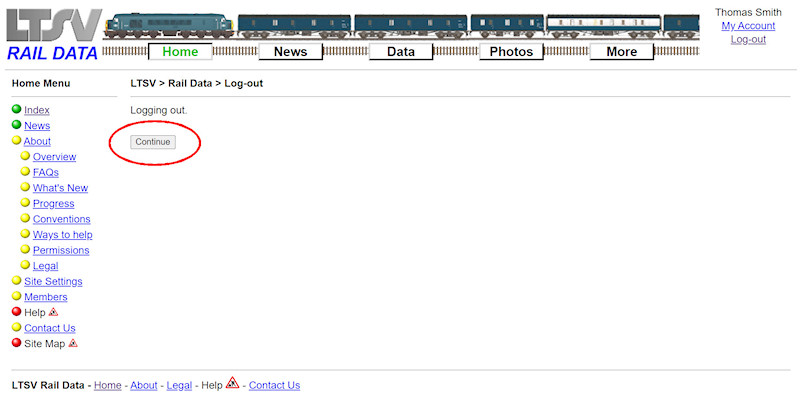
Logging-out is not strictly necessary, as the settings are only session-persistent. This means that, when you close your browser window, the details are cleared. However, it is best practice to manually log-out when you are done, particularly if you are using a PC in a shared environment. A Log-out link will appear in the top right hand corner of every page. Click on this, then click on the Continue button to complete the process.

2.1.3 My Account

screenshot
When you are logged-in, a My Account link will appear in the top right corner of every page. Click on this to access and change details of your account.

screenshot
The My Account page has the same information that is presented when you log-in, plus some other bits and pieces. To make any changes, click on the Edit account details button.

screenshot
This page allows you to change your username, your password or the 'About Me' text. Note that you cannot change your e-mail address. If you need to do this, please contact Site Admin. Also note that you cannot change your username to one that is already in use. If you do change your username, the new name will appear against all your content, regardless of when it was added.

screenshot
Make any changes required then click the Submit for preview button.

screenshot
As usual, this will show a preview of your changes (assuming there were no errors). Check again that the stripping out of special characters has not changed your content, then click the Submit button. Or use the form in the lower part of the page to make further changes and click on Re-submit for preview.

screenshot
If the changes have been applied, a simple message will be shown.

screenshot
Back on the My Account page, the second box gives a summary of activity related to your account. Click the View all my events button to see more details.

screenshot
The My Account Events page shows all the events recorded against your account. These are generally items not related to any content you have contributed, examples including log-ins, and changes to your account details. If you are concerned that something shows here that suggests your account has been used by someone else, please contact Site Admin.

screenshot
The bottom section of the My Account pages shows changes to your content since your last log-in. There is nothing to show here yet, so we will come back to this later on.

2.1.4 Site settings

screenshot
You can change various aspects of how the site is displayed. Any such settings are usually only session-persistent (i.e. they will be cleared when you close the browser window). However, if you are logged-in, you have the option to make these the default for your account. To change site settings, click the Home button on any page, then the Site Settings link in the left-hand menu.

screenshot
On the Site Settings page, the first section has nine options for overall appearance, three each for colours and font size. Clicking on any of the boxes in this section will apply that style.

screenshot
This is the result of applying smaller font and grey background.

screenshot
This is the result of applying larger font and black background.

screenshot
I personally like the medium font and white background, so let's go back to that. The second section allows you to apply highlighting to certain elements of the text in news items and profiles. Clicking any of the boxes will apply the style shown. Here is the result of applying red font to TOPS codes and green font to numbers on the News page. I think this can make it easier to pick out key information.

screenshot
Here is the same combination applied to a Profile page.

screenshot
When you have the site settings the way you want them, you can make these the default for your account, meaning they will be automatically applied each time you log-in. To do this, click on the Update default style button.

screenshot
If you go back to the My Account page, you will see that your site settings preferences are now changed.
2.1.5 Permissions and Approvals

screenshot
A slightly complex model of permissions and approvals has been used on the LTSV-RD website. In short, when you first register your account is set at Trainee level, and anything that you post will not be publicly visible until it has been approved by Admin, an Editor or another user (who has already reached Contributor status). Each time one of your items is approved, your approval account is increased by one. When you have had 25 items approved, you automatically become a Contributor. Anything you subsequently post will be visible straight away, and you can also approved content from other users. All of this is also explained on the About - Permissions page in the Home section.

screenshot
You can view your current permission level and approval count on the My Account page.

2.1.6 Viewing other member's accounts

screenshot
You can view some details of other member's accounts. Click on Members in the side menu of the Home section to see the list of members. This shows their username, the date they joined, and the quantity of Sightings and Notes they have posted. You can sort on any column by clicking one of the red arrows at the top (the currently applied sort order is shown by the green arrow).

screenshot
Clicking on any username in the Members list will open the Member Details page, as shown here. This only shows the public information about the member, such as their 'About Me' text.

screenshot
Sorting the Members list by sight count (reversed) highlights the fact that a very small number of users have contributed the vast majority of content, while many users have not made any contributions so far. Hopefully this situation will change over time.